I’ve been playing a lot with home automation recently, and in particular I’ve been installing a lot of cheap ESP8266-based Wi-Fi relays, such as the Sonoff Basic, Sonoff SV, Sonoff S31, Sonoff iFan02, and Shelly1, which have all been flashed to run the open-source Tasmota firmware. These communicate with Home Assistant through an MQTT message broker over Wi-Fi. Home Assistant, in turn, allows the devices to work with schedules, timers, voice-activated cylinders, and so on. With the exception of the Sonoff Basic, I would happily recommend these devices to anyone with some electrical knowledge and DIY skills.
One advantage of having automation-enabled lights in the kids rooms is being able to turn on their lights to help get them out of bed on school days. For that reason, I set up the ceiling fan in Lucas’s room with an iFan02 (replacing the Hunter RF control module), one of his floor lamps on an S31 and the other on a Basic.
Now he needed a convenient way to turn on/off the floor lamp and nightstand lamp without physically switching them off, which would prevent them from being turned on by automations.
Here is the result:
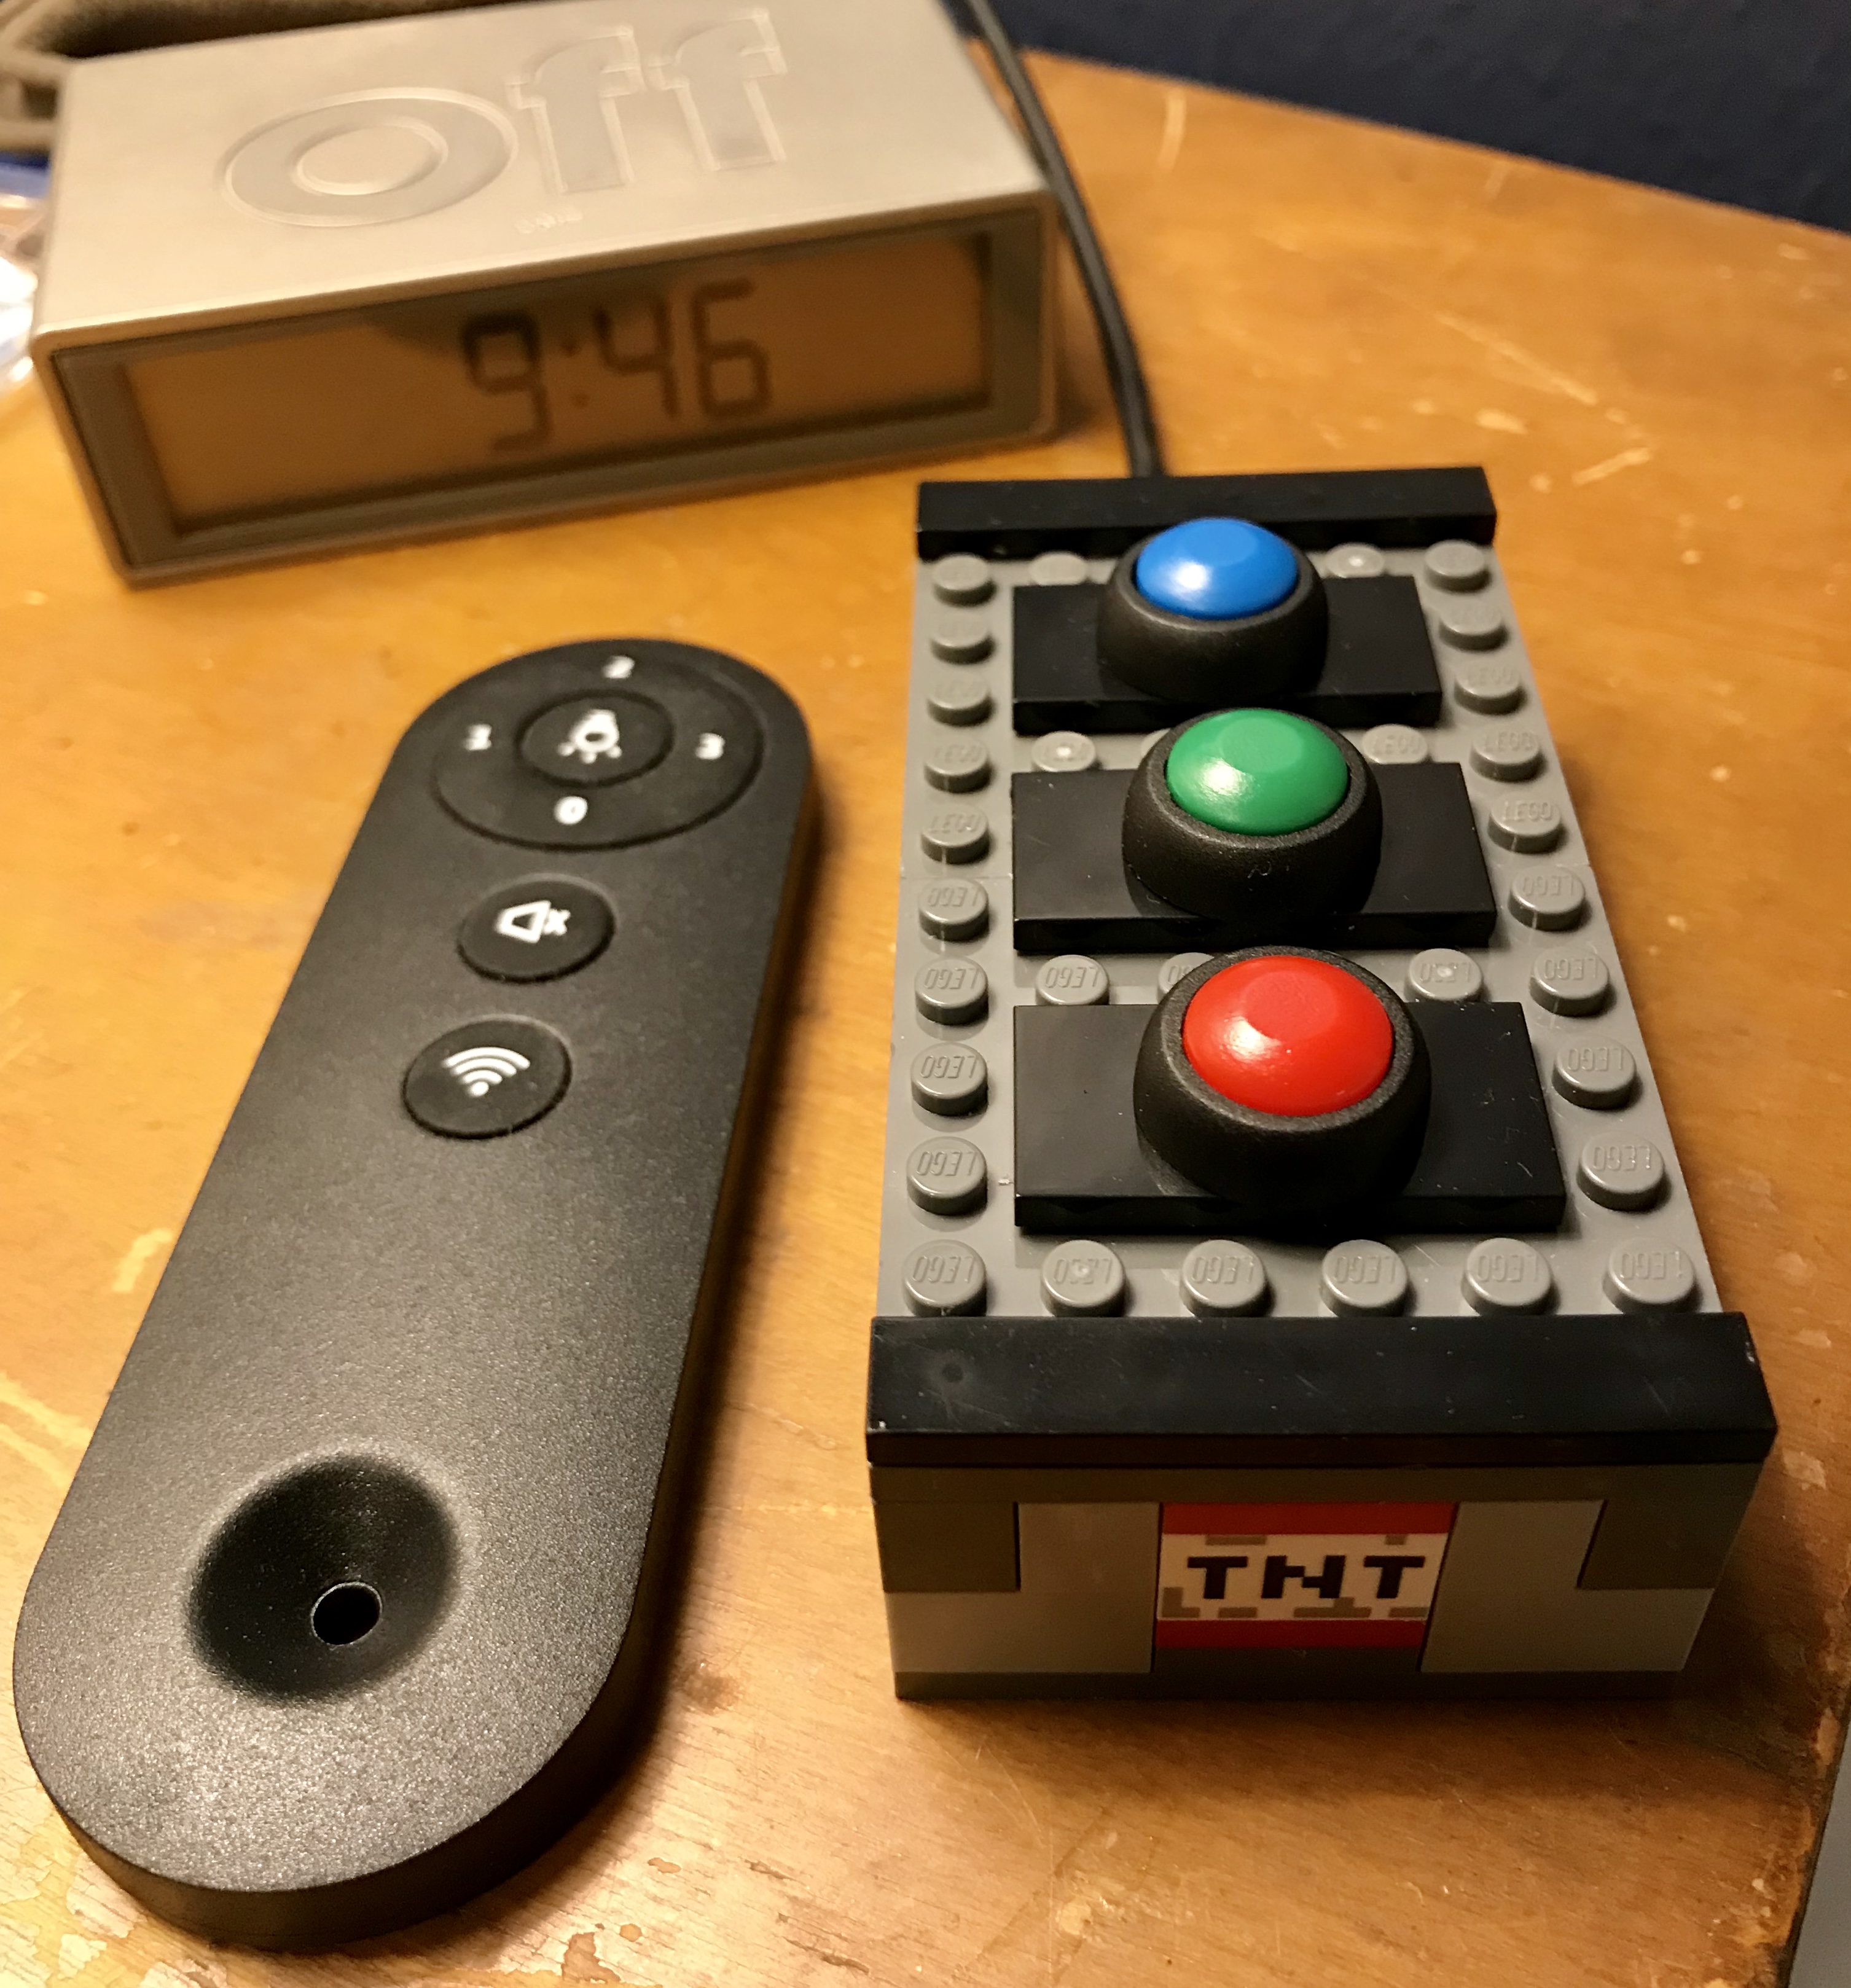
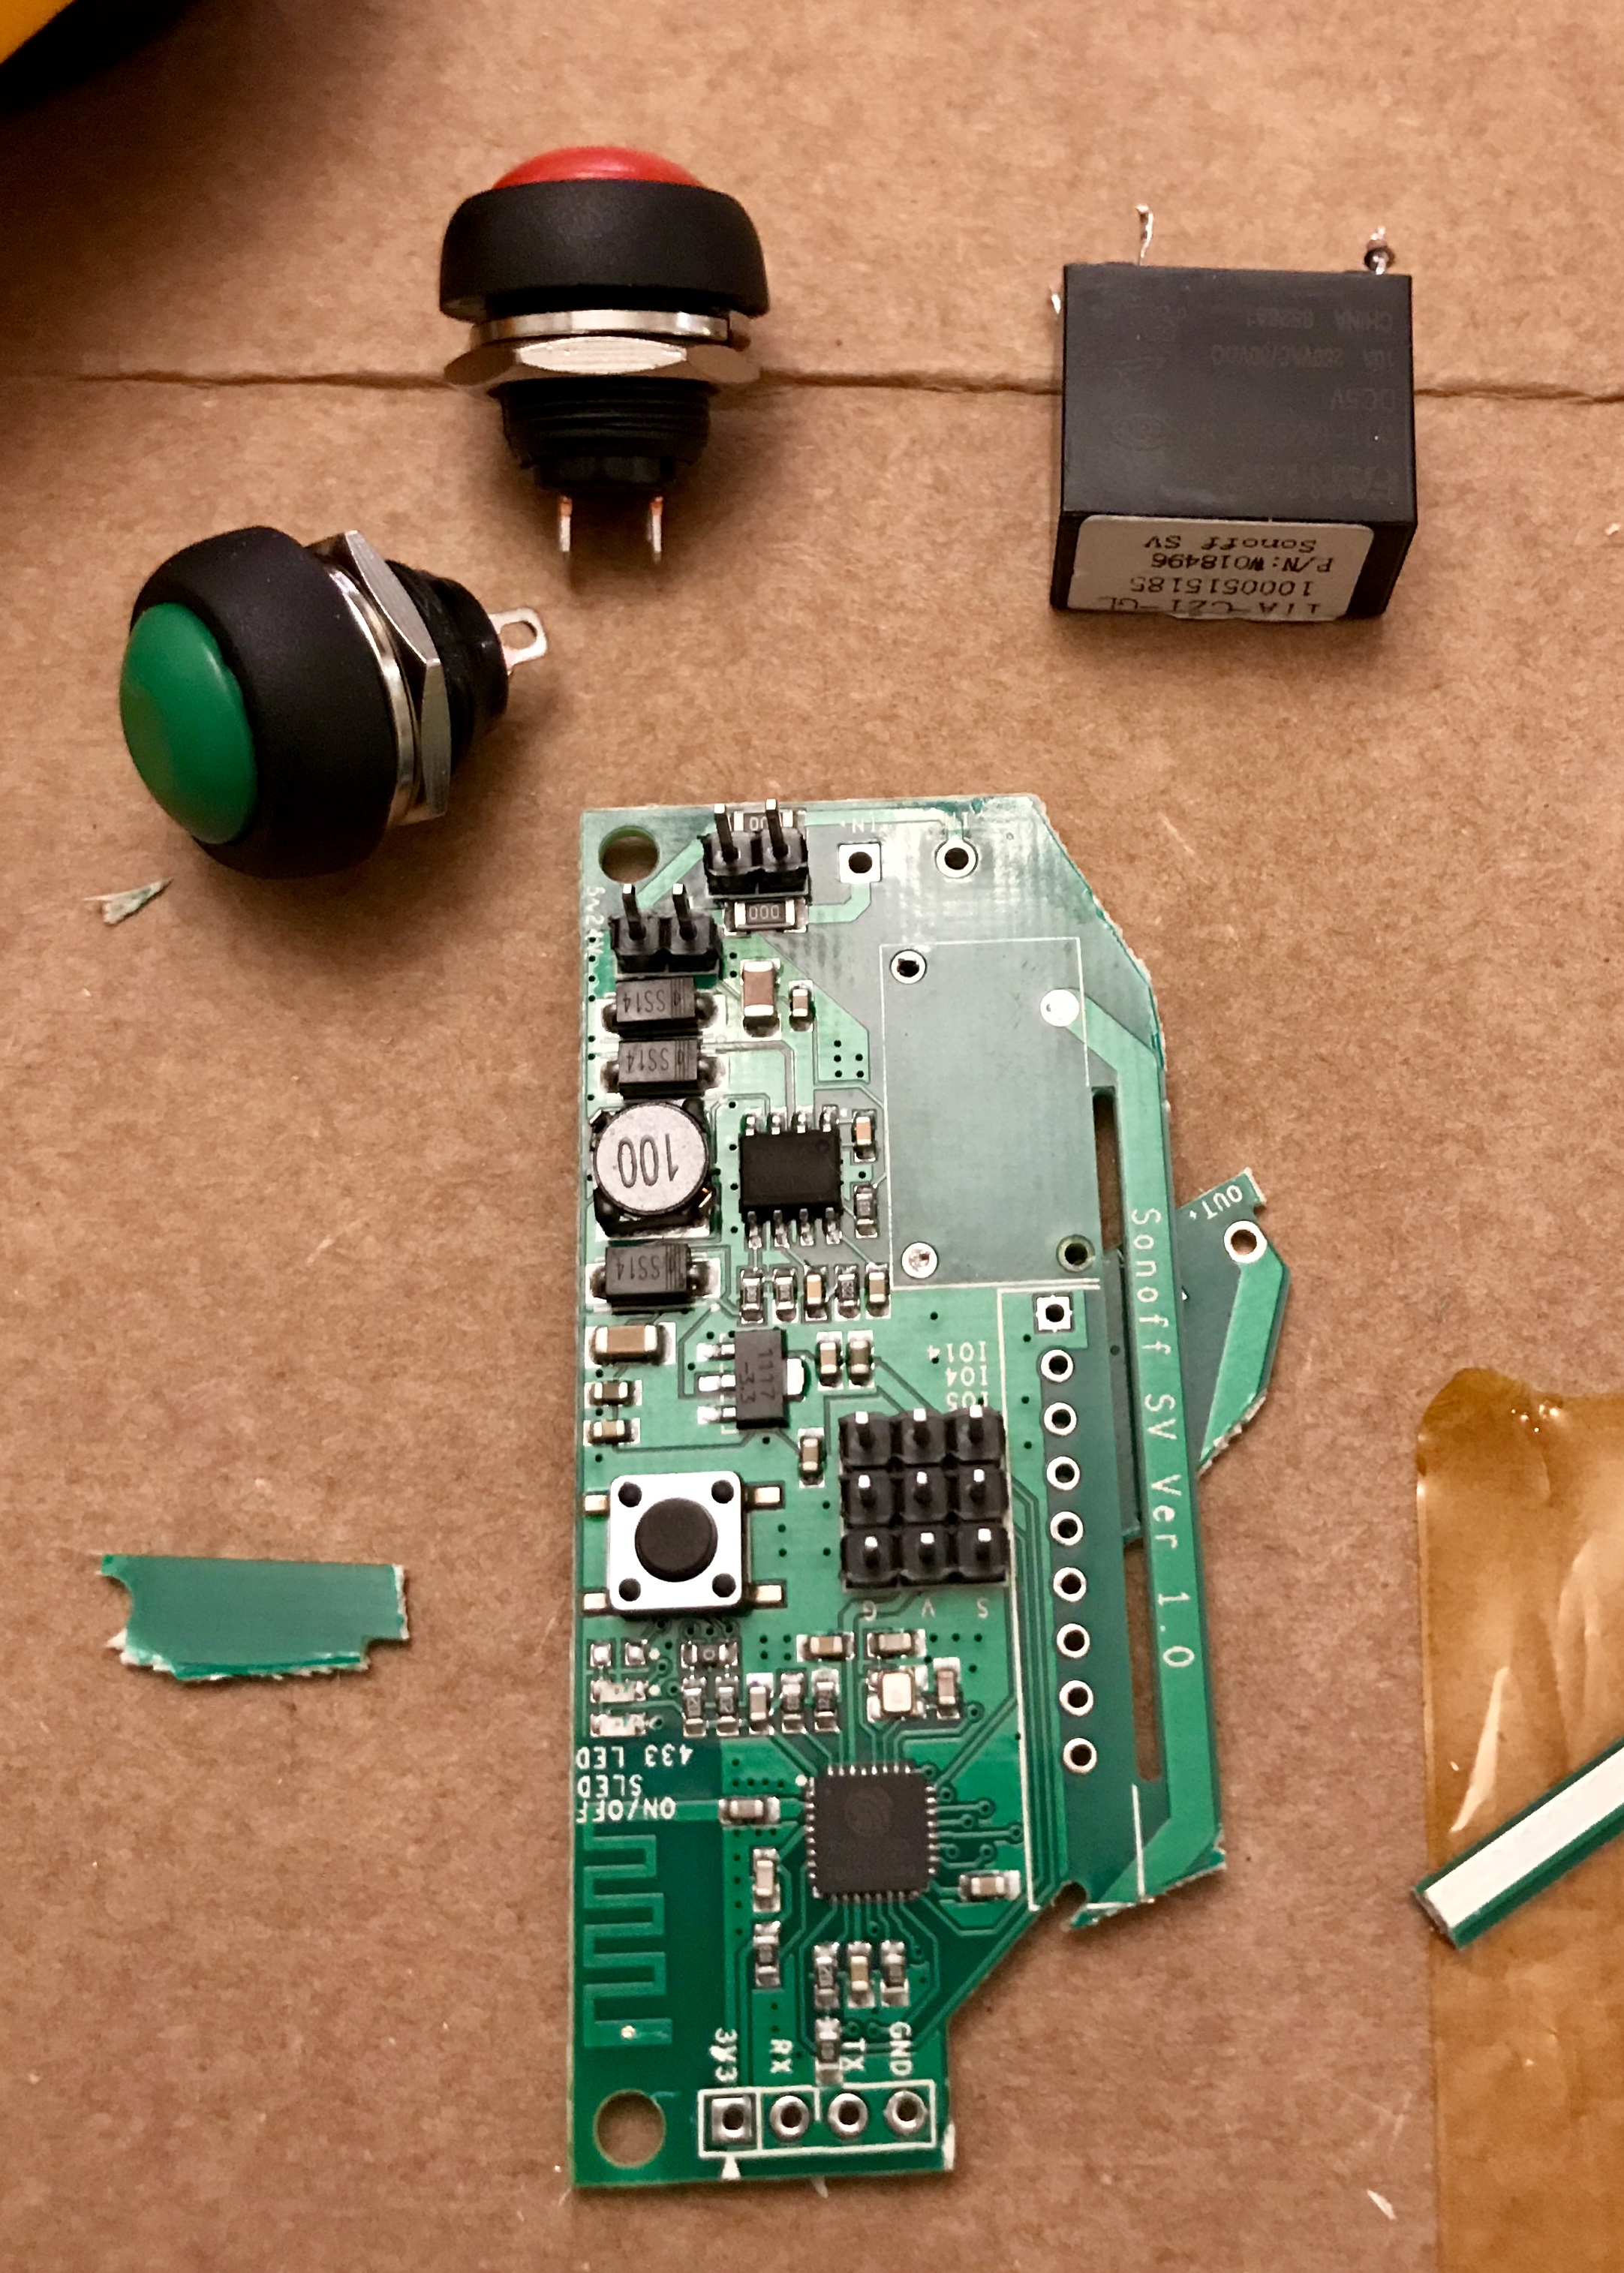
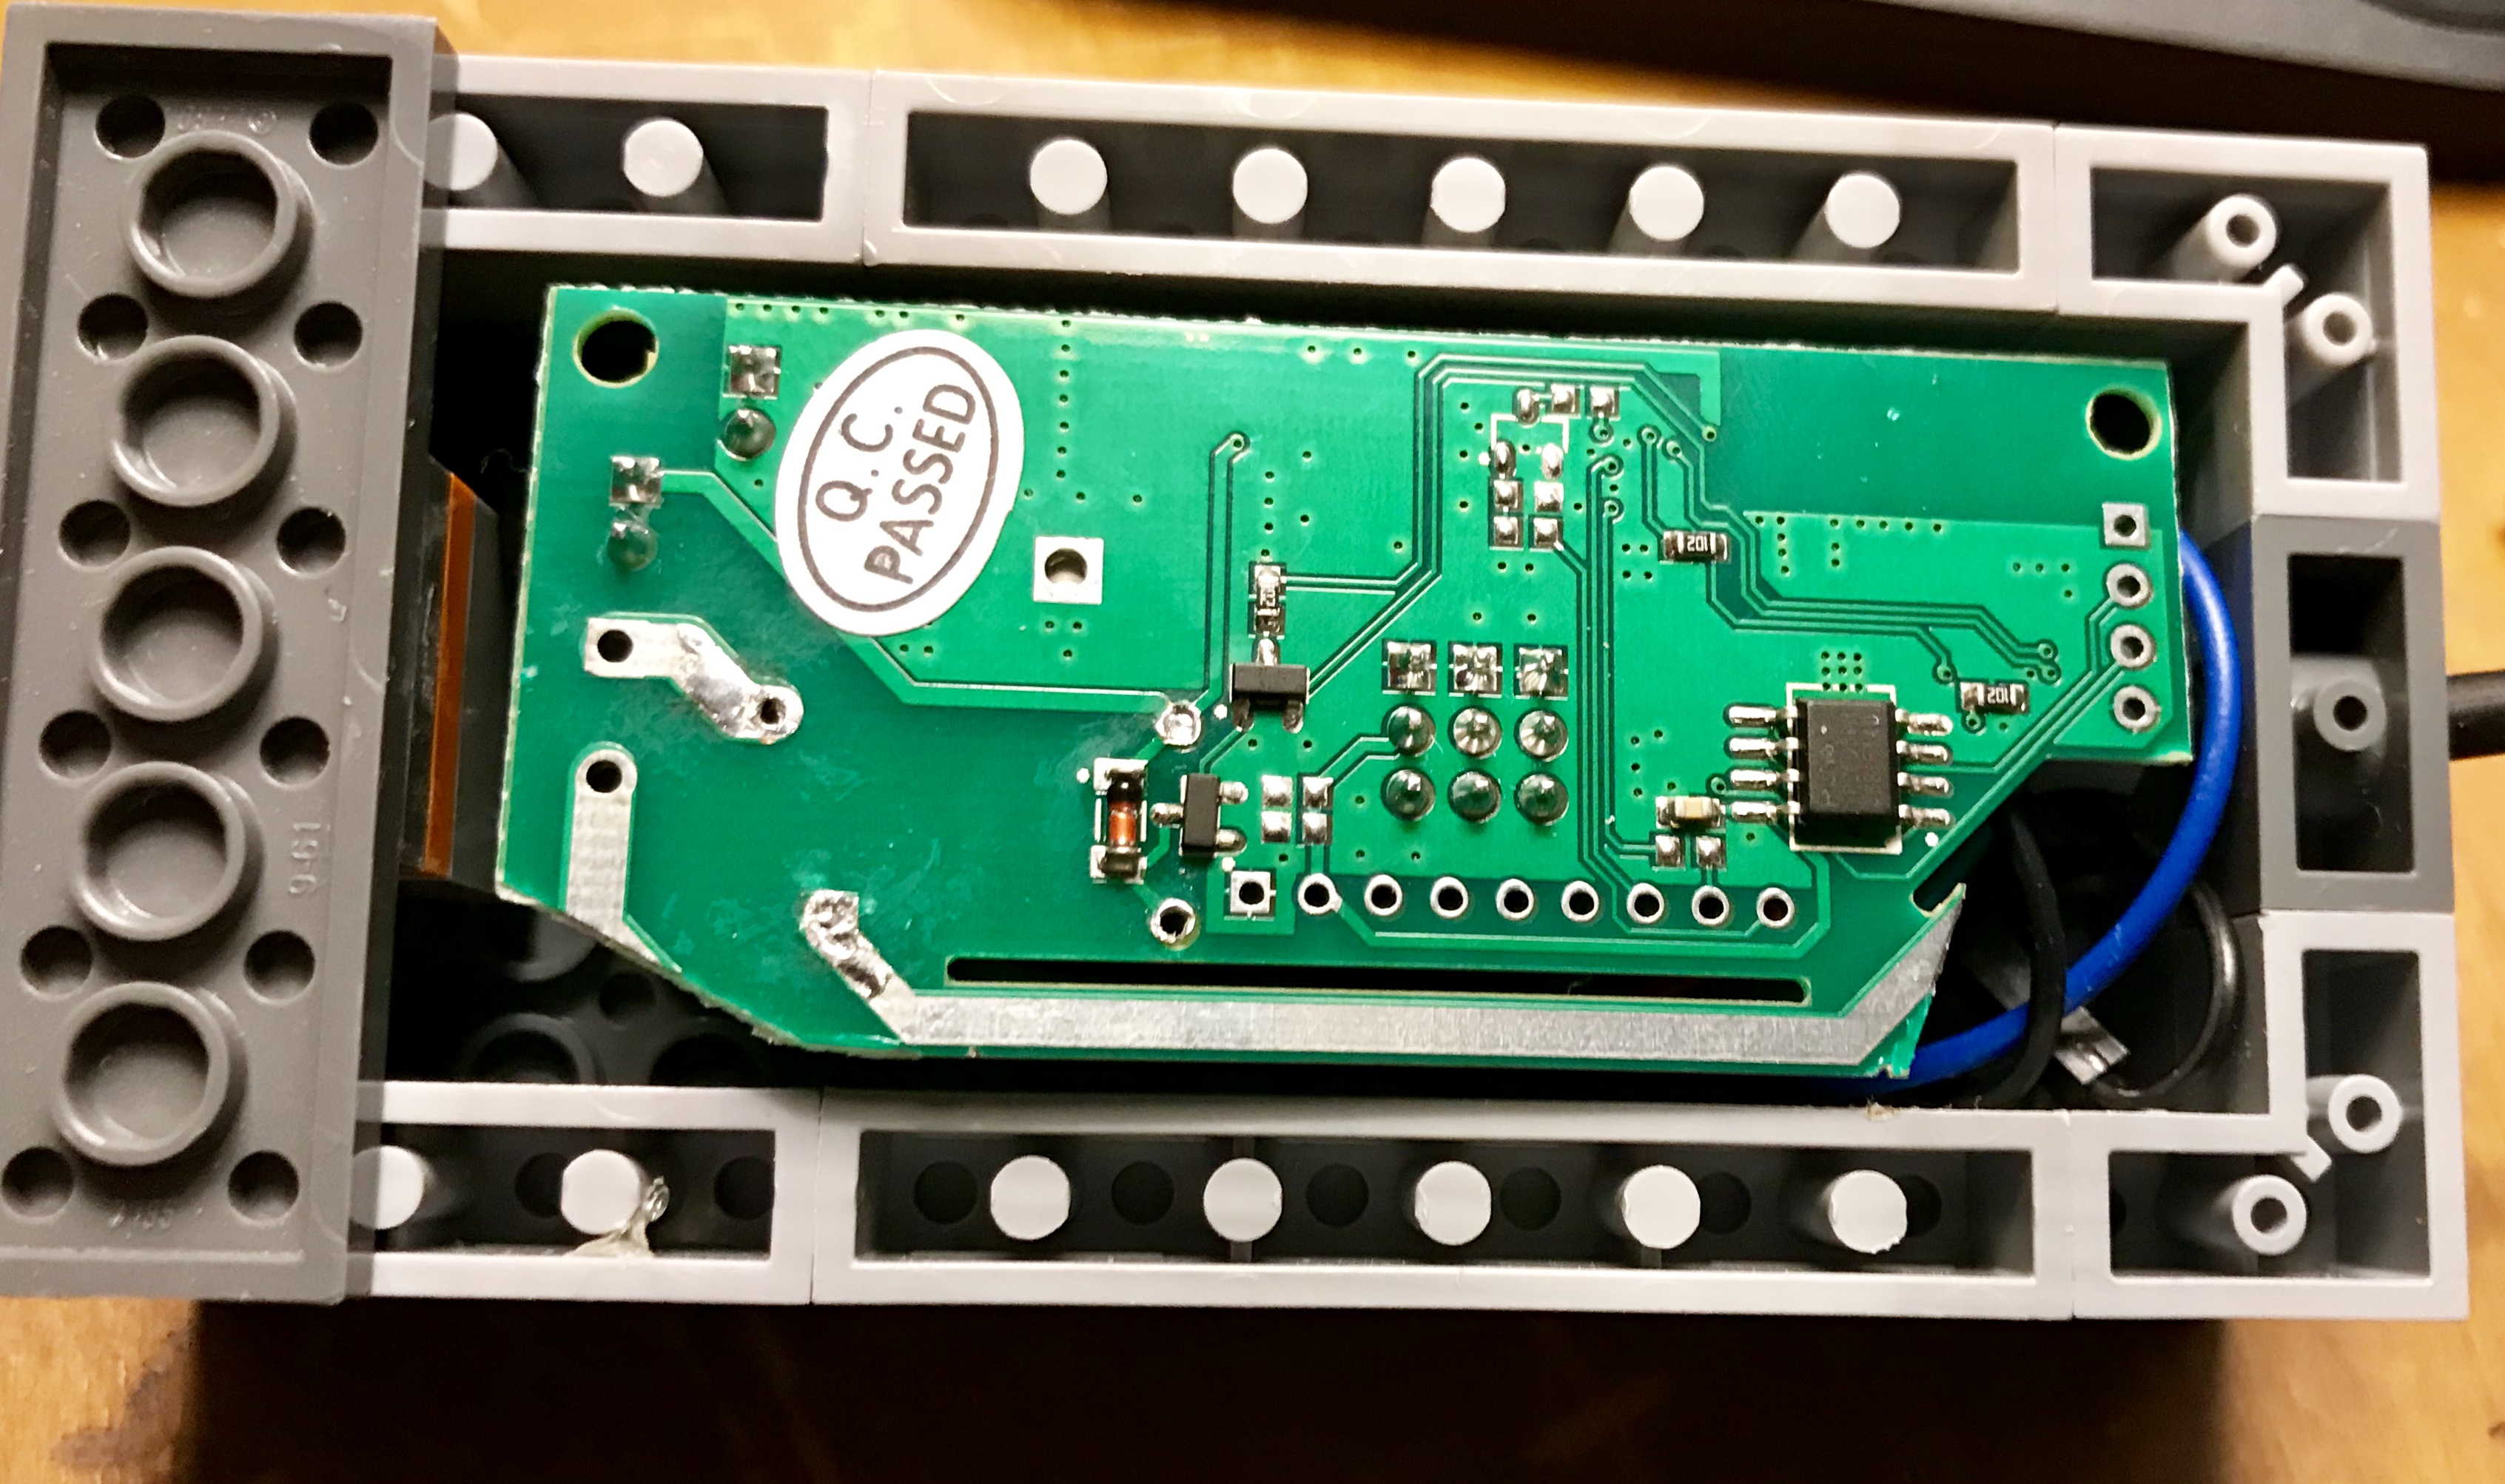
Each of the buttons toggles the state of a different light. The LEGO parts were scavenged from a large parts bin. The buttons came from a local electronics shop. Inside is a Sonoff SV, powered by a re-purposed USB cable. The Sonoff SV was modified somewhat to make it fit in the small enclosure: I removed the relay and the side of the board carrying the relay outputs, and the header pins were bent at about a 45 degree angle to keep them out of the way of the pushbuttons. Power comes from an old iPhone USB charger.
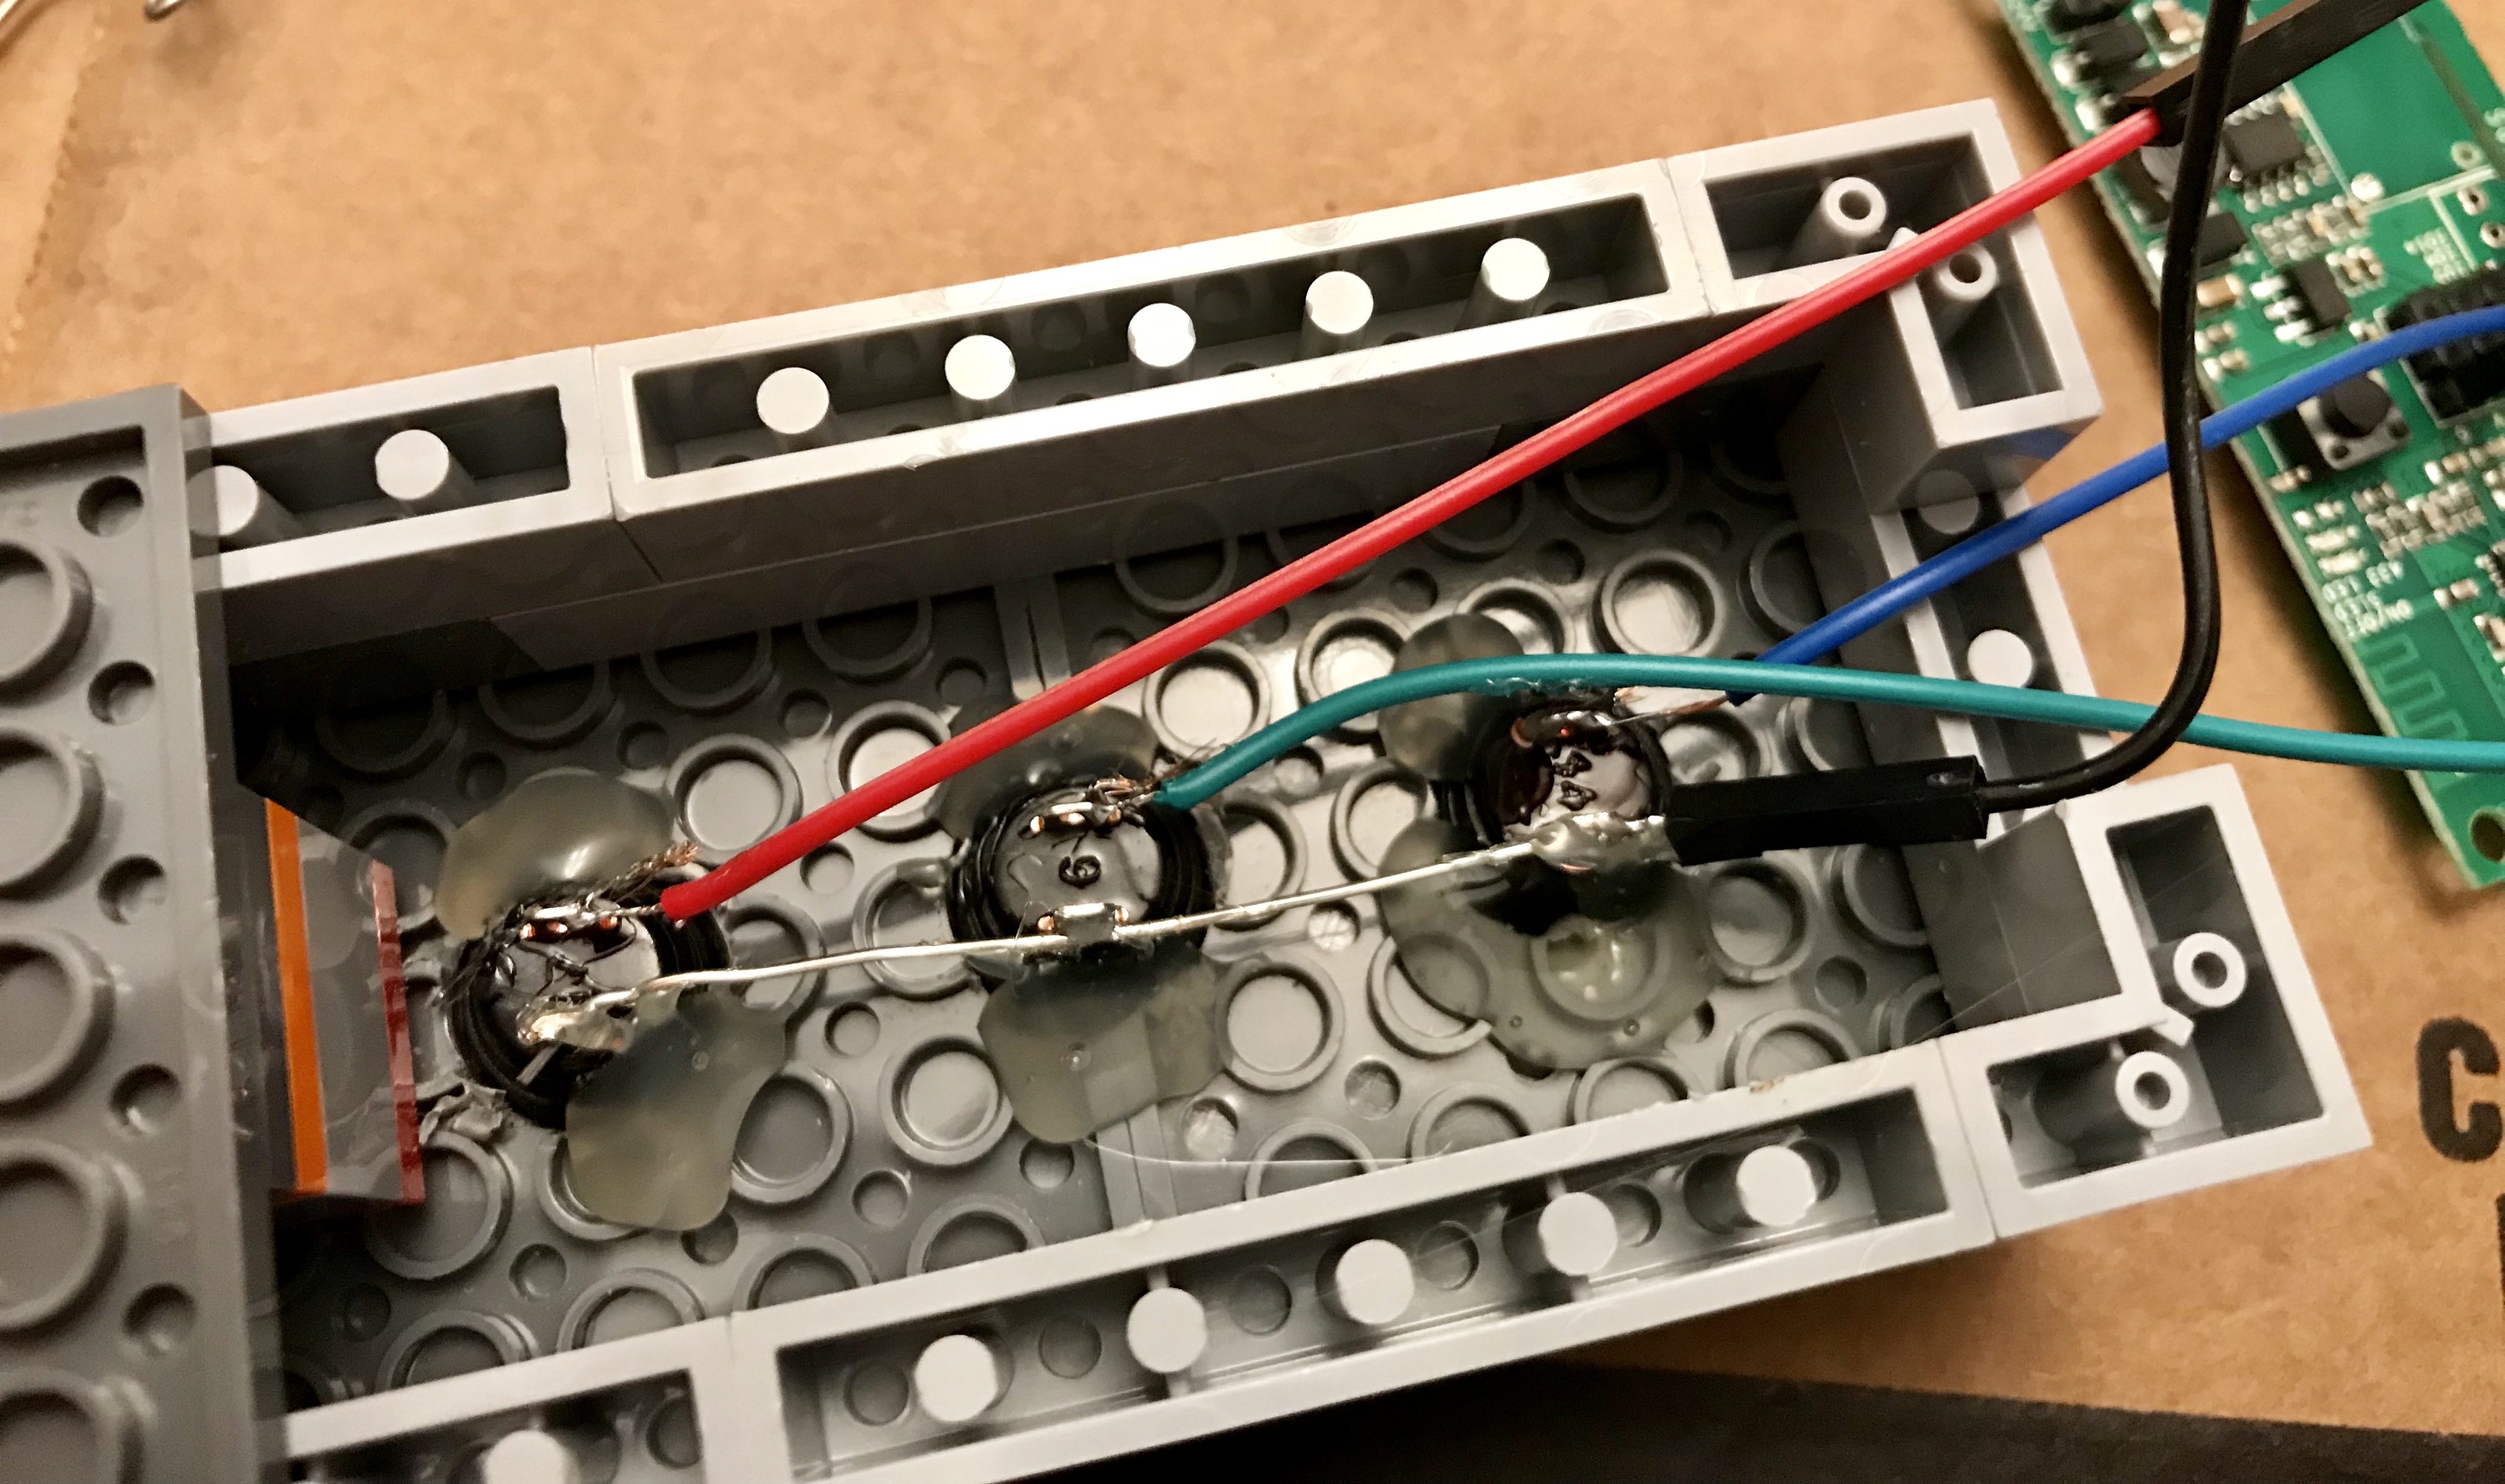
Installing the buttons was probably the hardest part of the build, but that’s not to say it was difficult. I hit the center of the smooth-surface blocks with a punch and then drilled them handheld without any issues. The bore is slightly more than ½″, which required some extra trimming. The depth of the LEGO prevented use of the button mounting hardware, so I used hot glue to hold them in place.
Internally, the buttons are connected to ground, with the other leg connected to a female header cable that plugs into the corresponding GPIO port. I used GPIO4, 5, and 14.
The USB power cable is fed through a block with a hole in it. A zip tie is used internally for strain relief.

Moving onto the software side, this is how I configured the Sonoff SV module with Tasmota 6.3.0.8:
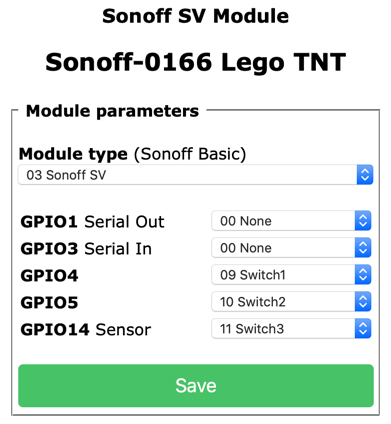
Finally, I had to configure it to toggle the other modules on and off with button presses. This doesn’t use Home Assistant at all; I used Tasmota rules to publish MQTT messages to the other devices directly. Home Assistant correctly observes their changed states automatically.
Tasmota supports a bunch of active rules at once, but they all end up concatenated together on one line. Ignore the line wrap below! This is the configuration I ended up using:
switchtopic1 0
switchmode1 5
switchmode2 5
switchmode3 5
setoption32 20
rule on switch1#state=2 do publish cmnd/sonoff-3325/power 2 endon on switch2#state=2 do publish cmnd/sonoff-3443/power 2 endon on switch3#state=2 do publish cmnd/sonoff-2833/power 2 endon
rule 1
The other lights correspond to topics sonoff-3325, 3443, and 2833. (I’m still new at this, but so far I’m keeping with the pre-assigned names rather than friendly names.)
That’s it! I hope this helps someone.
This build was inspired by @mike2nl and @andrethomas on the Tasmota Discord channel. If you get stuck with Tasmota, I’ve found the channel to be very helpful.